Lucid for Education
Lucid for Education is now available to all Canvas users. Lucid for Education is a suite of two visual applications: Lucidspark and Lucidchart. Use Lucidspark for free-form whiteboard activities such as mind mapping, brainstorming, or collaboration. Leverage Lucidchart for detailed, structured diagramming activities such as flowcharts. Lucid documents can be created by Canvas users, students can be assigned Lucid activities in Canvas, and classes can collaborate on a Lucid document together. Learn more below about how to access Lucid for Education, activate your account, and create/share Lucid documents. Additionally, consider registering for a Mind Mapping Workshop.
All Canvas users now have access to Lucid for Education, an online whiteboarding tool. Lucid for Education contains two tools: Lucidspark and Lucidchart. Deciding between the two depends on your use case. Typically, if you’ll be using Lucid to help with detailed, structured diagramming, we recommend you utilize Lucidchart. If you’re using Lucid for a freeform activity like mind mapping or brainstorming, Lucidspark will be best. Learn more about the difference between Lucidchart & Lucidspark.
To access the Lucid for Education suite, you will first need to connect your Canvas account to Lucid. Follow the documentation on this page to activate your Lucid account, learn how you can access Lucid, and browse additional helpful resources to learn more about the tool.
Getting Started
There are three ways to activate your Lucid for Education account in Canvas. One way is to open the “Lucid (Whiteboard)” page, which can be added to the Course Navigation Menu in any of your Canvas courses by going to “Settings > Navigation”. You can also either click on the Lucid icon anywhere you can access the Rich Content Editor (such as on a page), or create a new assignment and use the “Lucid” submission type to facilitate a graded Lucid activity for your students.
For all activation methods, you’ll be prompted to connect your Canvas account to your new (or existing) Lucid account. Refer to the Lucid Onboarding Steps below for more guidance.
Accessing Lucid via the “Lucid (Whiteboard)” page
To access Lucid via the Lucid (Whiteboard) page in canvas, you’ll begin by adding Lucid to your course’s navigation menu.
- Go to “Settings” in your course
- Select “Navigation”
- Enable Lucid (Whiteboard).
Save your updates.

Lucid (Whiteboard) is now enabled in your course navigation and is accessible to you and your students. The first time you access it, you’ll be prompted to activate your Lucid account; refer to the Lucid Onboarding Steps below for more information.
Use case: Use this option to quickly create a Lucid document without leaving Canvas. When ready to share your document, copy and share the document’s “Share Link”, or refer to other sections of this page for how to embed your document into a Canvas page or assignment.
Accessing Lucid via the Rich Content Editor
Lucid is available to instructors and students wherever the Rich Content Editor is available (i.e., editing a Canvas page, text-submission assignments, discussion threads). Accessing Lucid in this way will permit the user to embed a new or existing Lucid document.
- To begin, select the Lucid icon from the Rich Content Editor toolbar to open Lucid.

2. If this is your first time accessing Lucid, you’ll be prompted to activate your account; follow the Lucid Onboarding Steps below for more information.
3. You’ll then be prompted to either create a “New” Lucid document (A), or select an existing document (B) from your Lucid files.
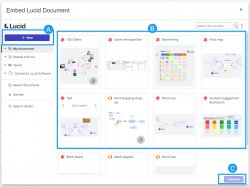
4. After you’ve made a selection, select “Continue” (C) to adjust access settings. Users have the following embed options for their Lucid document:
- Edit- viewers can edit, view, and leave comments on the shared Lucid document
- Comment only- Viewers can only view the Lucid document and add comments
- View only- Viewers can only view the Lucid document
5. Once you’ve made your selection, embed your Lucid document by selecting “Insert.” Multiple Lucid documents can be embedded using the Rich Content Editor.
Use cases: Embed a Lucid document into a Canvas page or Canvas announcement for all students in your course to collaborate on. Ask students to share their own Lucid documents to a Canvas discussion thread or assignment submission.
Accessing Lucid via the Assignment Option
Create a graded Lucid assignment in Canvas for your students.
- Create assignment
- Set Submission type to “Lucid”
- Click Lucid button
- If this is your first time using Lucid in your course, follow the Lucid Onboarding Steps below to activate your Lucid account.
- You can now choose between Lucidspark/Lucidchart as an assignment.
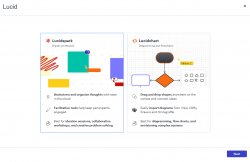
Lucid assignments will provide each student with their own copy of the Lucid document you attach to the assignment. If you’d like students to create their own Lucid document from scratch, simply attach a Blank Lucidspark or Lucidchart document to the assignment.
Currently, Lucid Canvas assignments do not support group assignment functionality. If you’d like students to work on a Lucid document in groups for a grade, follow the Lucid Group Assignment Workaround instructions.
Use Case: This is the best method to utilize for an individual graded Lucid assignment. If you’d like students to include specific elements in their Lucid documents, consider creating a Lucid Document for students to start with (rather than a blank document) for graded assignments.
Lucid Group Assignment Workaround Instructions
Currently, group Lucid assignments are not supported in Canvas. If you’d like to create an assignment where students work in small groups for a graded Lucid assignment, follow the instructions for a workaround:
- Create a graded group discussion in Canvas
- Ask one member of each group to embed a Lucid document to the discussion board (refer to Accessing Lucid via the Rich Content Editor). Group members can collaborate on the board together and you’ll be able to view/access for grading in speedgrader.
Note: If you’d like to have groups work from a Lucid document you’ve created for them, you’ll need to create one copy of the document for each group. Then, embed or post the share link to each group’s discussion board.
Lucid Onboarding Steps
The first time you access Lucid in your course, you’ll be prompted to create your Lucid account. Find more information on this process below:
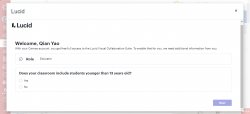
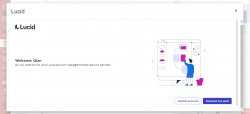
- Once you access Lucid, a “Welcome” message will appear. Confirm your role and select whether classroom includes students younger than 13. Select “No” and then click “Next.”
2. You will next be asked to log in to the Lucid Visual Collaboration Suite. For this, you will want to choose to log in with your Google account.
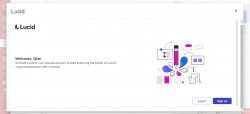

At this step, make sure you’re logging in with your Montclair Google account (not a personal account). If you are logged in with a personal account in another tab or the browser itself (typically Chrome), please log out of your personal account or switch to a different browser like Firefox to complete the account provisioning process.

3. After confirming your Montclair Google account, select “Connect to Lucid.”
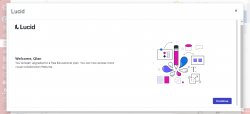
4. You’ll receive confirmation that you’ve been “upgraded to a free Educational plan.” Select “Continue.”
5. You now have access to the Lucid Education Suite. Click “Get Started”

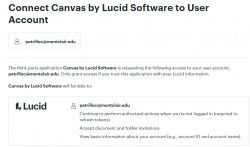
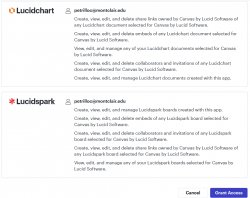
6. The last step will be to grant Lucid access to your Canvas account. Click “Grant Access.” Lucid onboarding through Canvas is now complete.
Lucid Resources & User Guide
To learn more about how to use Lucid tools, refer to the resources below:
- Lucid Instructor Guide
- Lucid Student Guide
- ITDS promotes Lucid as the recommended tool for mind mapping activities. Learn more about how to utilize Lucid for mind mapping by attending our Mind Mapping Workshop and schedule a 1 on 1 Mind Mapping Consultation to learn more.
All Canvas users now have access to Lucid for Education, an online whiteboarding tool. You may have the opportunity to work with Lucid in a course. This page will provide you with information on how to activate your Lucid account, embed/share a Lucid document in your course, and share additional resources to learn more about using Lucid.
Getting Started
You may access Lucid in a few ways in your Canvas course. The first time you open Lucid in Canvas, you’ll be prompted to create a Lucid account. Refer to the Lucid Onboarding Steps below to walk you through the activation process.
Your instructor may ask you to access Lucid in 3 different ways: through your course’s navigation, via the Canvas Rich Content Editor, or through a Lucid graded assignment.
Access via Course Navigation
If enabled by your instructor, you may access Lucid tools by selecting the “Lucid (Whiteboard)” option from your course navigation menu. Doing so will open Lucid in a new tab. This is a quick-and-easy way to create new Lucid documents and view your personal Lucid dashboard.
Access via Canvas’ Rich Content Editor
Lucid is available to you wherever the Rich Content Editor is active (i.e., a text-submission assignment or a discussion thread post). Accessing Lucid with the Rich Content Editor will permit you to embed a new or existing Lucid document.
- To begin, select the Lucid icon from the Rich Content Editor toolbar.

2. If this is your first time accessing Lucid, you’ll be prompted to activate your account; follow the Lucid Onboarding Steps below for more information.
3. You’ll then be prompted to either create a “New” Lucid document (A), or select an existing document (B) from your Lucid files.
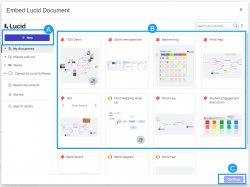
4. After you’ve made a selection, select “Continue” (C) to adjust access settings. You have the following embed options for your Lucid document:
- Edit- viewers can edit, view, and leave comments on the shared Lucid document
- Comment only- Viewers can only view the Lucid document and add comments
- View only- Viewers can only view the Lucid document
5. Once you’ve made your selection, embed your Lucid document by selecting “Insert.” Multiple Lucid documents can be embedded using the Rich Content Editor.
Access via a Lucid Assignment
Your instructor may assign a Lucid activity for you to complete for a grade in Canvas. Begin by opening the assignment. If it’s your first time using Lucid, you’ll be prompted to activate your account (see Lucid Onboarding Steps below). The assigned Lucid document will be embedded to the assignment page for you to complete. When finished with your work, select “Submit assignment,” add any applicable comments, and select “submit.”
Any changes you make to your Lucid document after submitting your assignment will not be visible to your instructor. If multiple submissions are permitted, make sure to resubmit your work if you make updates.
Lucid Onboarding Steps
When accessing Lucid for the first time in a course, you will be prompted to create your free Lucid for Education account. Find more information on this process below:
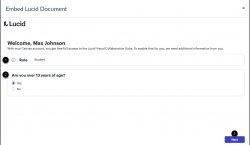
- Once you access Lucid, a “Welcome” message will appear. Confirm your role and that you are over 13 years of age. Click “Next” to continue.
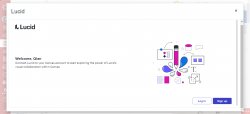
2. Connect Lucid to your Canvas account by selecting “Sign up.” If you’ve already activated your account previously in another course, select “log in.”
3. You may be asked to log in to the Lucid Visual Collaboration Suite. For this, you will want to choose to log in with your Montclair Google account.
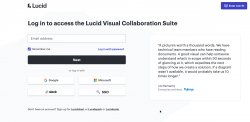
At this step, make sure you’re logging in with your Montclair Google account (not a personal account). If you are logged in with a personal account in another tab or the browser itself (typically Chrome), please log out of your personal account or switch to a different browser like Firefox to complete the account provisioning process.

4. After confirming your Montclair Google account, select “Connect to Lucid.”
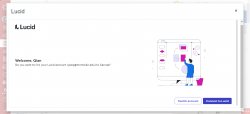
5. You’ll receive confirmation that you’ve been “upgraded to a free Educational plan.” Select “Continue.”
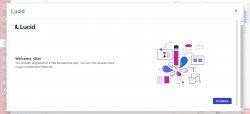
6. You now have access to the Lucid Education Suite. Click “Get Started”

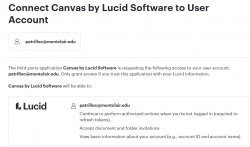
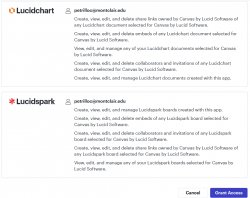
7. The last step will be to grant Lucid access to your Canvas account. Click “Grant Access.” Lucid onboarding through Canvas is now complete.
Lucid Resources & User Guide
To learn more about how to use Lucid tools, refer to the resources below:
ITDS Consultations: ITDS staff are available year round to meet with you to discuss your course(s) and provide guidance on designing your course(s) across modalities, instructional strategies, syllabus design, teaching/learning activities, instructional technologies and more. You can set up an appointment with one of our ITDS staff via the ITDS Consultation Scheduler.
